内容概述 登录功能设计实现,以及涉及到的类设计与流程分析
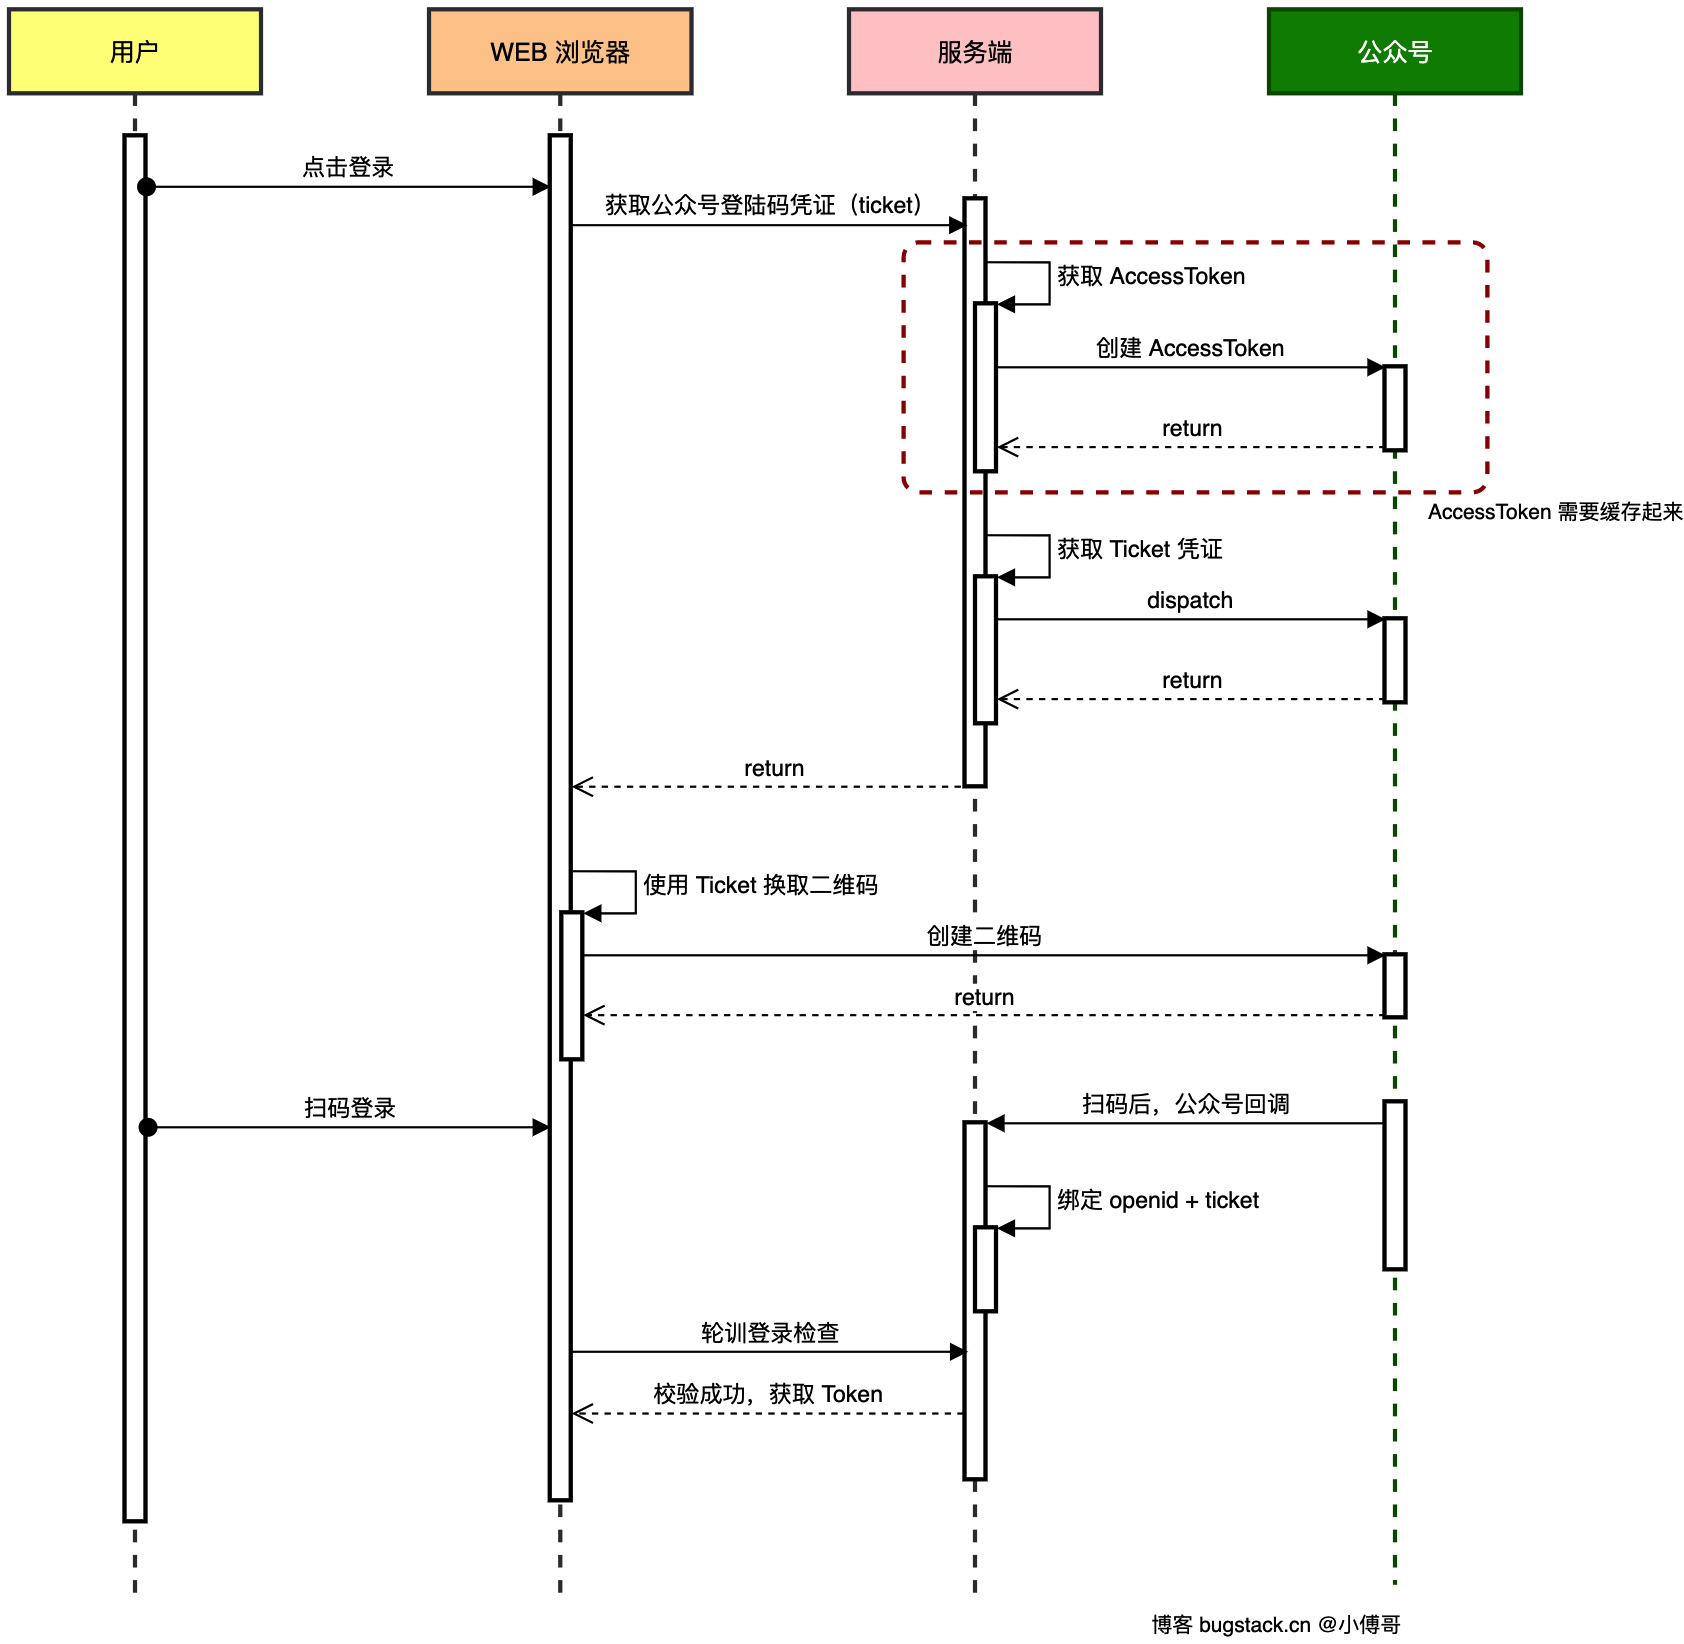
流程分析 小傅哥版本流程图:
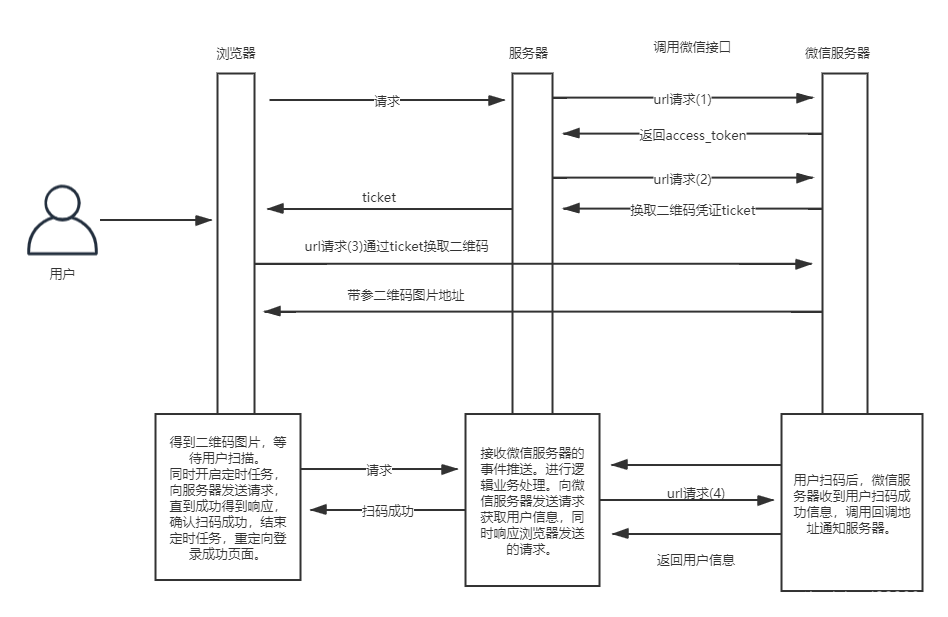
简略版本流程图:核心流程 :
用户点击登录,浏览器向服务器请求ticket
服务器检测是否缓存有有效的access token,如果没有则向微信服务器请求(请求需要appid和secret两个参数,这两个参数在微信公众平台可以查看)(生成access token:https://developers.weixin.qq.com/doc/service/guide/dev/api/#%E7%94%9F%E6%88%90-Access-Token )
服务器使用access token作为参数调用微信服务器的API
微信服务器返回ticket至服务器
服务器将ticket传回给浏览器
浏览器通过ticket拼接出图片URL(https://mp.weixin.qq.com/cgi-bin/showqrcode?ticket=xxx ) ,并显示二维码
用户扫描网页的二维码
微信服务器回调配置好的回调地址,通知扫码事件,并在请求中携带ticket与扫码用户的openid
浏览器持续向服务器查询登录状态,参数为ticket
服务器收到轮询后如果发现ticket已经绑定了openid,则生成token并返回给浏览器作为登录凭证
1. 用户点击登录,浏览器向服务器请求ticket 1 2 3 4 5 6 7 8 fetch ('http://localhost:8091/api/v1/login/weixin_qrcode_ticket' ) .then (response =>json ()) .then (data => if (data.code === "0000" ) { const ticket = data.data ; } })
2-5. 服务器获取access token并调用微信API获取ticket 1 2 3 4 5 6 7 8 9 10 11 12 13 14 15 16 17 18 19 20 21 22 23 24 25 26 27 28 29 30 31 @Override public String createQrCodeTicket () throws Exception { String accessToken = weixinAccessToken.getIfPresent(appid); if (null == accessToken) { Call<WeixinTokenRes> call = weixinApiService.getToken("client_credential" , appid, appSecret); WeixinTokenRes weixinTokenRes = call.execute().body(); assert weixinTokenRes != null ; accessToken = weixinTokenRes.getAccess_token(); weixinAccessToken.put(appid, accessToken); } WeixinQrCodeReq weixinQrCodeReq = WeixinQrCodeReq.builder() .expire_seconds(2592000 ) .action_name(WeixinQrCodeReq.ActionNameTypeVO.QR_SCENE.getCode()) .action_info(WeixinQrCodeReq.ActionInfo.builder() .scene(WeixinQrCodeReq.ActionInfo.Scene.builder() .scene_id(100601 ) .build()) .build()) .build(); Call<WeixinQrCodeRes> call = weixinApiService.createQrCode(accessToken, weixinQrCodeReq); WeixinQrCodeRes weixinQrCodeRes = call.execute().body(); assert null != weixinQrCodeRes; return weixinQrCodeRes.getTicket(); }
6. 浏览器显示二维码
7-8. 用户扫码与微信服务器回调 1 2 3 4 5 6 7 8 9 10 11 12 13 14 15 16 17 18 19 20 21 22 @PostMapping(value = "receive", produces = "application/xml; charset=UTF-8") public String post (@RequestBody String requestBody, @RequestParam("signature") String signature, @RequestParam("timestamp") String timestamp, @RequestParam("nonce") String nonce, @RequestParam("openid") String openid, @RequestParam(name = "encrypt_type", required = false) String encType, @RequestParam(name = "msg_signature", required = false) String msgSignature) { try { MessageTextEntity message = XmlUtil.xmlToBean(requestBody, MessageTextEntity.class); if ("event" .equals(message.getMsgType()) && "SCAN" .equals(message.getEvent())) { loginService.saveLoginState(message.getTicket(), openid); return buildMessageTextEntity(openid, "登录成功" ); } } }
9-10. 浏览器轮询与登录状态验证 1 2 3 4 5 6 7 8 9 10 11 12 13 14 15 16 17 18 19 const intervalId = setInterval (() => { checkLoginStatus (ticket, intervalId); }, 3000 ); function checkLoginStatus (ticket, intervalId ) { fetch (`http://localhost:8091/api/v1/login/check_login?ticket=${ticket} ` ) .then (response =>json ()) .then (data => if (data.code === "0000" ) { console .info ("login success" ); clearInterval (intervalId); } }) }
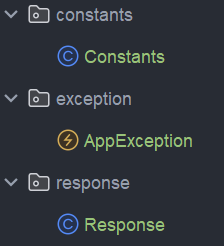
类设计 common模块 Constants 类的作用
定义通用常量 :如SPLIT常量用于字符串分割统一响应码管理 :通过ResponseCode枚举定义标准化的API响应码和信息订单状态管理 :通过OrderStatusEnum枚举定义标准化的订单状态流转
注解解析 @AllArgsConstructor作用 :自动生成包含所有字段的构造方法
@NoArgsConstructor作用 :自动生成无参构造方法
@Getter作用 :自动生成所有字段的getter方法
AppException 类的作用 :AppException是项目中定义的自定义运行时异常类,主要用于统一管理和处理业务逻辑中的异常情况。定义了两个核心字段
codeinfo
@EqualsAndHashCode(callSuper = true)作用 :主要用于自动生成Java对象的equals()和hashCode()方法,其参数callSuper的作用是:是否调用父类的equals和hashCode方法。默认情况下为 false,即不会调用父类的方法参考文章
Reponse 类的作用 :Response是项目中定义的标准API响应封装类,主要用于统一规范前后端交互的数据格式。包含三个核心字段:
code :响应状态码info :响应描述信息data :泛型数据字段
@Data
自动生成所有字段的getter和setter方法
自动生成toString()方法,格式化输出对象信息
自动生成equals()和hashCode()方法,支持对象比较
自动生成canEqual()方法,用于判断对象是否为同一类型
@Builder
提供建造者模式的实现,支持链式调用设置属性
生成静态的builder()方法,用于创建Builder实例
生成Builder内部类,包含各个字段的setter方法
特别适合创建属性较多的对象,使代码更简洁、可读性更高
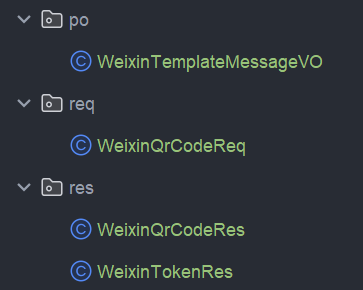
domain模块 domain包包含了以下四类:
po/WeixinTemplateMessageVO.java - 微信模板消息值对象req/WeixinQrCodeReq.java - 微信二维码请求数据封装类res/WeixinQrCodeRes.java - 微信二维码响应数据封装类res/WeixinTokenRes.java - 微信AccessToken响应数据封装类
发送模板消息 获取AccessToken 生成带参的二维码
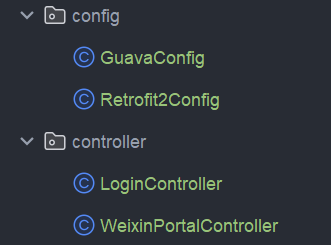
web模块 关于 **@configuration**:用该注解修饰的类本身也是一个Bean,但它的主要职责是生产其他Bean,里面包含了用于定义和组装Spring容器中Bean的配置信息。@Configuration和@Component的区别:@Configuration使用了CGLIB代理,保证了所有带有@Bean注解的方法都是单例的。
其中Guava在本项目的主要作用是作为本地缓存缓存AccessToken和OpenIdToken,这里也可以用Redis替代。Retrofit2用于与微信API进行通信。
LoginController 类的作用 :LoginController是项目中定义的登录控制器类,主要负责处理用户登录相关的请求。weixinQrCodeTicket()生成微信二维码,以及checkLogin()用于检查登录状态。
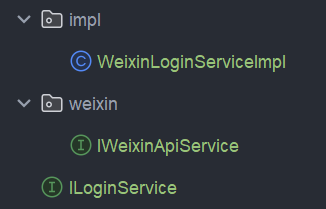
service模块 注意事项 在web包下的application-dev.yml中,增加teplate_id字段:
1 2 3 4 5 6 7 8 weixin: config: originalid: token: app-id: app-secret: template_id:
扩展
将本地缓存Guava修改为Redis
1. 在pom.xml中添加Redis的依赖 这里我们可以选择引入Redis或者直接引入Redisson,这里我们选择Redisson
在web模块下的pom.xml中添加redisson的依赖:
1 2 3 4 <dependency > <groupId > org.redisson</groupId > <artifactId > redisson-spring-boot-starter</artifactId > </dependency >
注意 :这里不需要引入版本号,因为根pom已经定义了版本号
2. 在application-dev.yml中添加Redis的配置 注意 :如果没有密码务必删除password这行,不然有可能出现连接问题
1 2 3 4 5 6 spring: redis: host: 127.0 .0 .1 port: 6379 password: database: 0
3. 定义RedissonConfig配置类 因为我们引入了redisson-spring-boot-starter,Spring Boot会自动帮助我们配置redisson,可以选择不定义RedissonConfig
但是,如果发现在Redis中存的数据出现乱码的情况,可以选择定义RedissonConfig来避免这个问题:
1 2 3 4 5 6 7 8 9 10 11 12 13 14 15 16 17 18 19 20 21 22 23 24 25 26 27 28 29 30 31 32 33 34 35 36 37 38 39 40 41 42 43 44 45 46 47 48 49 50 51 52 53 package cn.bugstack.config;import com.fasterxml.jackson.databind.ObjectMapper;import com.fasterxml.jackson.databind.SerializationFeature;import com.fasterxml.jackson.datatype.jsr310.JavaTimeModule;import org.redisson.Redisson;import org.redisson.api.RedissonClient;import org.redisson.codec.JsonJacksonCodec;import org.redisson.config.Config;import org.redisson.config.SingleServerConfig;import org.springframework.beans.factory.annotation.Value;import org.springframework.context.annotation.Bean;import org.springframework.context.annotation.Configuration;import org.springframework.util.StringUtils;@Configuration public class RedissonConfig { @Value("${spring.redis.host}") private String host; @Value("${spring.redis.port}") private String port; @Value("${spring.redis.password:}") private String password; @Bean public RedissonClient redissonClient () { Config config = new Config (); SingleServerConfig serverConfig = config.useSingleServer() .setAddress("redis://" + host + ":" + port); ObjectMapper mapper = new ObjectMapper (); mapper.registerModule(new JavaTimeModule ()); mapper.disable(SerializationFeature.WRITE_DATES_AS_TIMESTAMPS); config.setCodec(new JsonJacksonCodec (mapper)); if (StringUtils.hasText(password)) { serverConfig.setPassword(password); } return Redisson.create(config); } }
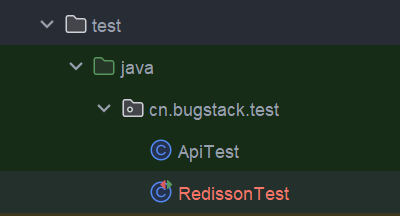
4. 测试Redisson连接 如果前面部分都没有问题,这里的测试类应该也都能顺利通过,测试类应该位于web模块下的test文件夹中
1 2 3 4 5 6 7 8 9 10 11 12 13 14 15 16 17 18 19 20 21 22 23 24 25 26 27 28 29 30 31 32 33 34 35 36 37 38 39 40 41 42 43 44 45 46 47 48 49 50 51 package cn.bugstack.test;import org.junit.jupiter.api.Test;import org.redisson.api.RBucket;import org.redisson.api.RMap;import org.redisson.api.RSet;import org.redisson.api.RedissonClient;import org.springframework.boot.test.context.SpringBootTest;import org.springframework.test.context.ActiveProfiles;import javax.annotation.Resource;import java.util.concurrent.TimeUnit;import static org.junit.jupiter.api.Assertions.*;@SpringBootTest @ActiveProfiles("dev") public class RedissonTest { @Resource private RedissonClient redissonClient; @Test public void testConnection () { assertNotNull(redissonClient, "RedissonClient should not be null" ); System.out.println("Redisson连接测试成功!" ); } @Test public void testStringOperations () { String key = "test:string:key" ; RBucket<String> bucket = redissonClient.getBucket(key); bucket.set("Hello Redisson!" ); System.out.println(bucket.get()); bucket.delete(); assertNull(redissonClient.getBucket(key).get()); System.out.println("字符串操作测试成功,并已清理测试数据" ); } }
如果两个方法都通过,则可以认为Redisson配置没有问题
5. Redisson代替Guava后的完整代码 1 2 3 4 5 6 7 8 9 10 11 12 13 14 15 16 17 18 19 20 21 22 23 24 25 26 27 28 29 30 31 32 33 34 35 36 37 38 39 40 41 42 43 44 45 46 47 48 49 50 51 52 53 54 55 56 57 58 59 60 61 62 63 64 65 66 67 68 69 70 71 72 73 74 75 76 77 78 79 80 81 82 83 84 85 86 87 88 89 90 91 92 93 94 95 96 97 98 99 100 101 102 103 104 105 106 107 108 109 110 111 112 113 114 115 116 117 118 119 120 121 122 123 124 125 126 127 128 129 130 131 132 133 134 135 package cn.bugstack.service.impl;import cn.bugstack.domain.po.WeixinTemplateMessageVO;import cn.bugstack.domain.req.WeixinQrCodeReq;import cn.bugstack.domain.res.WeixinQrCodeRes;import cn.bugstack.domain.res.WeixinTokenRes;import cn.bugstack.service.ILoginService;import cn.bugstack.service.weixin.IWeixinApiService;import org.redisson.api.RBucket;import org.redisson.api.RedissonClient;import org.slf4j.Logger;import org.slf4j.LoggerFactory;import org.springframework.beans.factory.annotation.Value;import org.springframework.stereotype.Service;import retrofit2.Call;import javax.annotation.Resource;import java.io.IOException;import java.time.Duration;import java.util.HashMap;import java.util.Map;import static cn.bugstack.common.constants.RedisConstants.*;@Service public class WeixinLoginServiceImpl implements ILoginService { private static final Logger logger = LoggerFactory.getLogger(WeixinLoginServiceImpl.class); @Value("${weixin.config.app-id}") private String appid; @Value("${weixin.config.app-secret}") private String appSecret; @Value("${weixin.config.template_id}") private String template_id; @Resource private IWeixinApiService weixinApiService; @Resource private RedissonClient redissonClient; @Override public String createQrCodeTicket () { try { logger.info("开始创建微信二维码ticket, appid: {}" , appid); String accessToken = getAccessToken(); WeixinQrCodeReq weixinQrCodeReq = WeixinQrCodeReq.builder() .expire_seconds(2592000 ) .action_name(WeixinQrCodeReq.ActionNameTypeVO.QR_SCENE.getCode()) .action_info(WeixinQrCodeReq.ActionInfo.builder() .scene(WeixinQrCodeReq.ActionInfo.Scene.builder() .scene_id(100601 ) .build()) .build()) .build(); Call<WeixinQrCodeRes> call = weixinApiService.createQrCode(accessToken, weixinQrCodeReq); WeixinQrCodeRes weixinQrCodeRes = call.execute().body(); if (weixinQrCodeRes == null || weixinQrCodeRes.getTicket() == null ) { throw new RuntimeException ("微信API返回空响应或缺少ticket" ); } logger.info("成功创建微信二维码ticket: {}" , weixinQrCodeRes.getTicket()); return weixinQrCodeRes.getTicket(); } catch (Exception e) { logger.error("创建微信二维码ticket失败" , e); throw new RuntimeException ("Failed to create QR code ticket" , e); } } @Override public String checkLogin (String ticket) { String key = OPENID_KEY_PREFIX + ticket; String result = redissonClient.<String>getBucket(key).get(); return result != null ? result : "" ; } @Override public void saveLoginState (String ticket, String openid) throws IOException { try { String key = OPENID_KEY_PREFIX + ticket; RBucket<String> bucket = redissonClient.getBucket(key); bucket.set(openid, Duration.ofHours(OPENID_TTL)); logger.info("已保存登录状态, ticket: {}, openid: {}" , ticket, openid); String accessToken = getAccessToken(); Map<String, Map<String, String>> data = new HashMap <>(); WeixinTemplateMessageVO.put(data, WeixinTemplateMessageVO.TemplateKey.USER, openid); WeixinTemplateMessageVO templateMessageDTO = new WeixinTemplateMessageVO (openid, template_id); templateMessageDTO.setUrl("http://www.zhazhabear.site" ); templateMessageDTO.setData(data); Call<Void> call = weixinApiService.sendMessage(accessToken, templateMessageDTO); call.execute(); logger.info("已发送微信模板消息, openid: {}" , openid); } catch (Exception e) { logger.error("保存登录状态或发送模板消息失败" , e); throw e; } } private String getAccessToken () throws IOException { String key = ACCESS_TOKEN_KEY_PREFIX + appid; RBucket<String> bucket = redissonClient.getBucket(key); String accessToken = bucket.get(); if (null == accessToken) { logger.info("缓存中未找到accessToken,从微信API获取" ); Call<WeixinTokenRes> call = weixinApiService.getToken("client_credential" , appid, appSecret); WeixinTokenRes weixinTokenRes = call.execute().body(); if (weixinTokenRes != null && weixinTokenRes.getAccess_token() != null ) { accessToken = weixinTokenRes.getAccess_token(); bucket.set(accessToken, Duration.ofHours(ACCESS_TOKEN_TTL)); logger.info("成功获取并缓存accessToken" ); } else { throw new IOException ("从微信API获取accessToken失败" ); } } else { logger.debug("从缓存中获取accessToken" ); } return accessToken; } }
